How to Install Torque-Tight Lug Nut Indicators
How to Install Torque-Tight Lug Nut Indicators
Torque-Tight lug nut indicators turn a loose lug nut into something a driver can spot in seconds during a walk-around. Installation takes about two minutes per wheel and requires no special tools beyond the torque wrench you already use. Follow the five steps below.
Time required: About 2 minutes per wheel. Tools: Calibrated torque wrench.
Step 1: Confirm your lug nut size
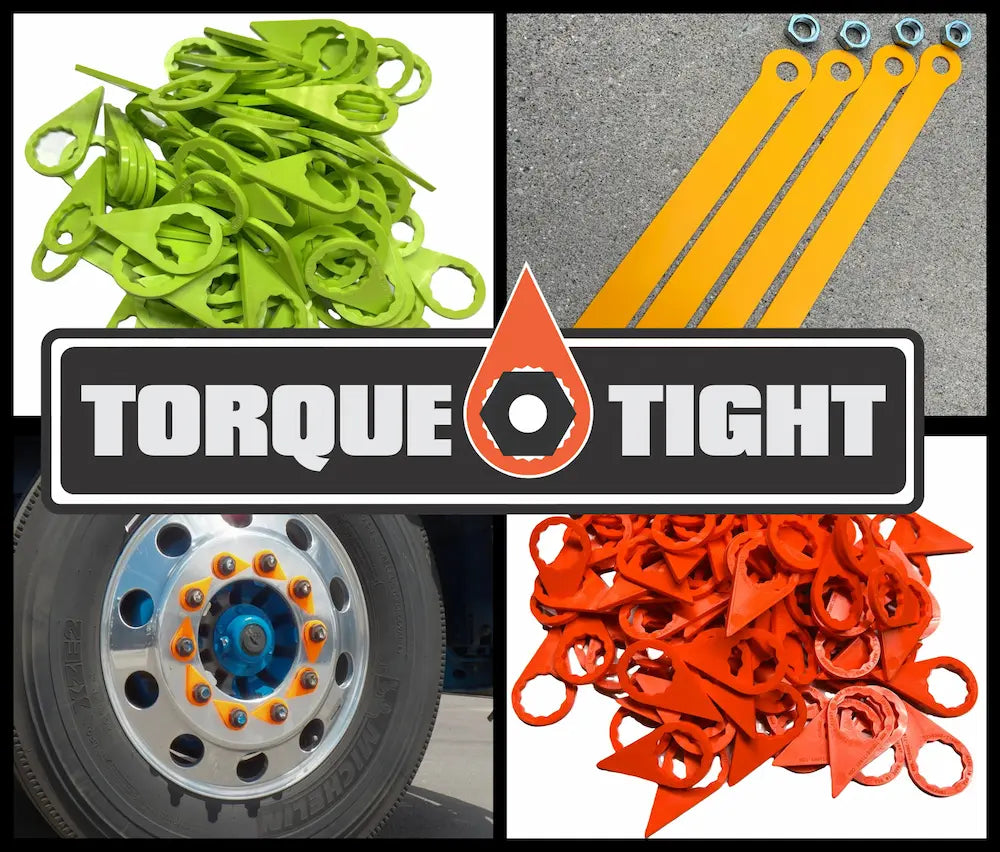
Measure your lug nut across the flats with calipers or a wrench to confirm the size before ordering. Torque-Tight indicators are injection molded in seven sizes: 13/16", 21mm, 22mm, 27mm, 32mm, 33mm, and 38mm. The indicator must match the lug nut size for a secure, lasting fit. The 33mm size fits the most common commercial flange nuts and is our best seller.
Step 2: Torque the lug nuts to spec
Tighten all lug nuts to the wheel manufacturer or your fleet's torque specification using a calibrated torque wrench. Do this before installing the indicators. Indicators are a visual inspection aid that show movement after the fact. They do not replace correct torque procedure and re-torque intervals.
Step 3: Press an indicator onto each lug nut
Push a correctly sized indicator straight down onto each lug nut until it seats fully on the flats. It should fit snugly by hand. Install one indicator per lug nut across the entire wheel so every nut is covered.
For 33mm indicators, the Torque-Tight installation tool seats each indicator quickly and evenly across a full wheel set, which saves time and protects your hands on high-count fleet jobs. The tool is optional, but it makes 33mm installs noticeably faster.
Step 4: Set all pointers to a common reference
This is the step that makes the whole system work. Rotate each seated indicator so every pointer aims at the same reference direction. Pick one rule for the wheel, for example all pointers aimed at the wheel center, or all set the same clock position. When every indicator starts in the same position, a nut that begins to loosen rotates its indicator out of line, and that mismatch is what the driver sees.

Step 5: Inspect during every walk-around
During each pre-trip or daily walk-around, scan each wheel for a few seconds. If every indicator still lines up, the nuts have held. Any indicator that has rotated out of line with its neighbors signals a lug nut that has moved. Pull that wheel from service, re-torque to spec, reset the indicators to the common reference, and re-inspect before driving.
Why fleets run indicators
Federal estimates point to roughly 750 to 1,050 wheel separation incidents on U.S. roads each year. A five-second visual check at every wheel gives drivers a no-tools way to catch a loosening nut before it becomes a wheel-off. Torque-Tight standard indicators are made in the USA and Buy America eligible, and are independently UV durability tested to ISO 17025 so the pointer color stays readable in the field instead of fading into a false all-clear.
Order the right size for your fleet
Not sure which size you need? Match your lug nut measurement to our fitment guide, or contact us for samples and fleet pricing.